-

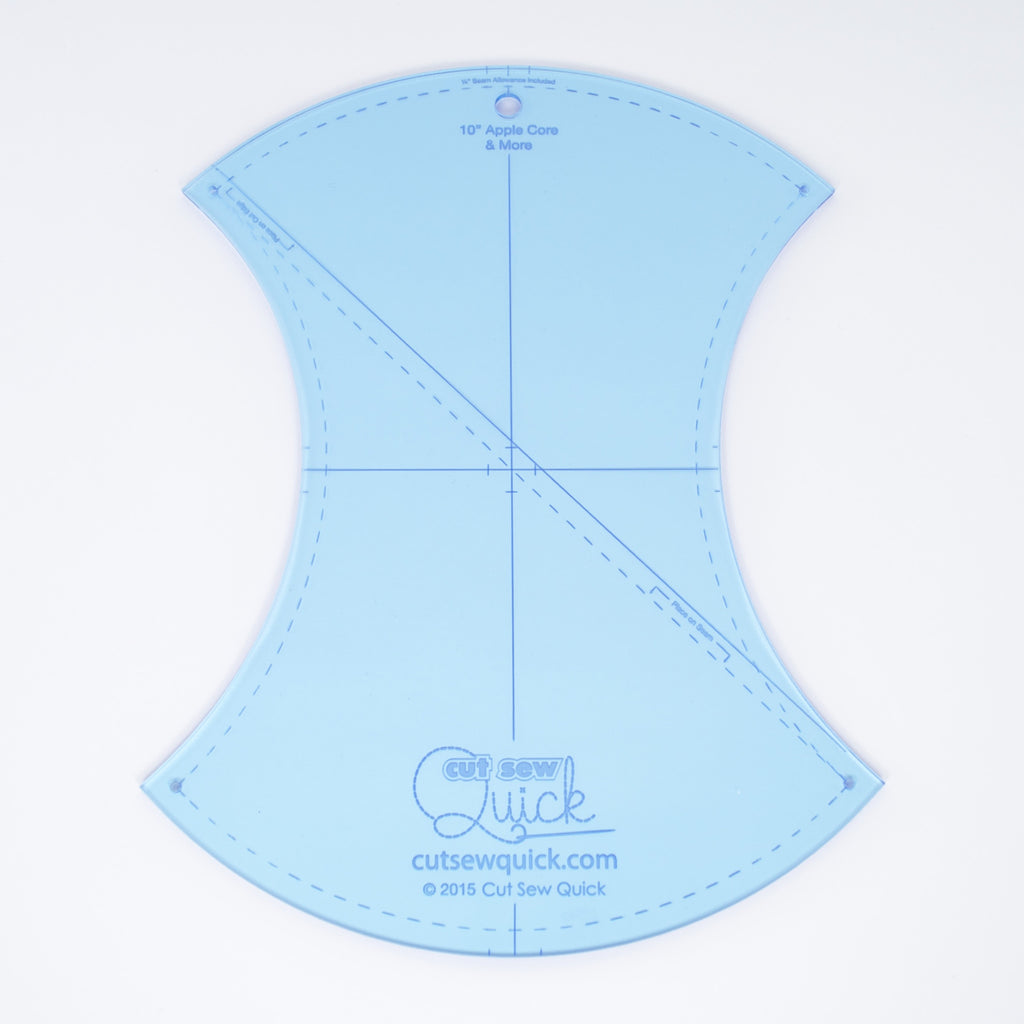
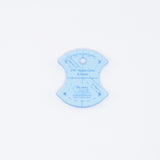
 10" Apple Core & More Template
 -
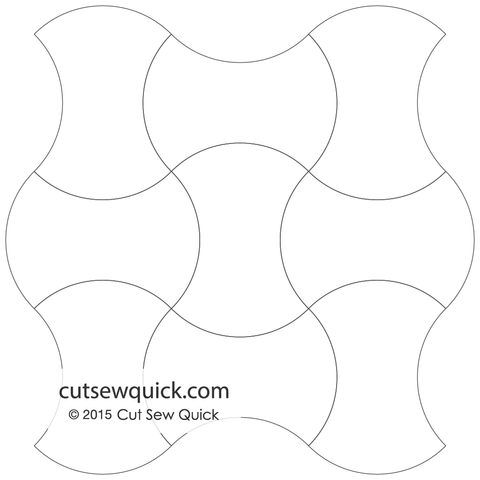
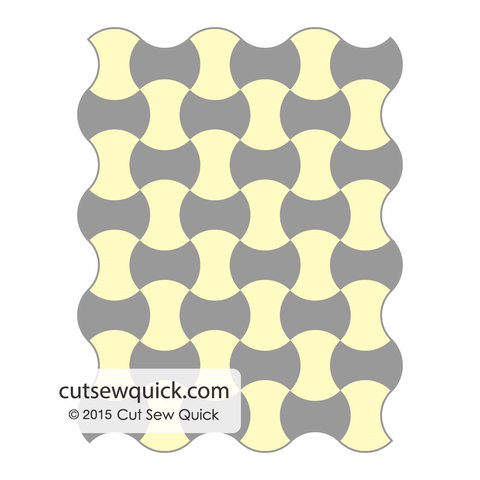
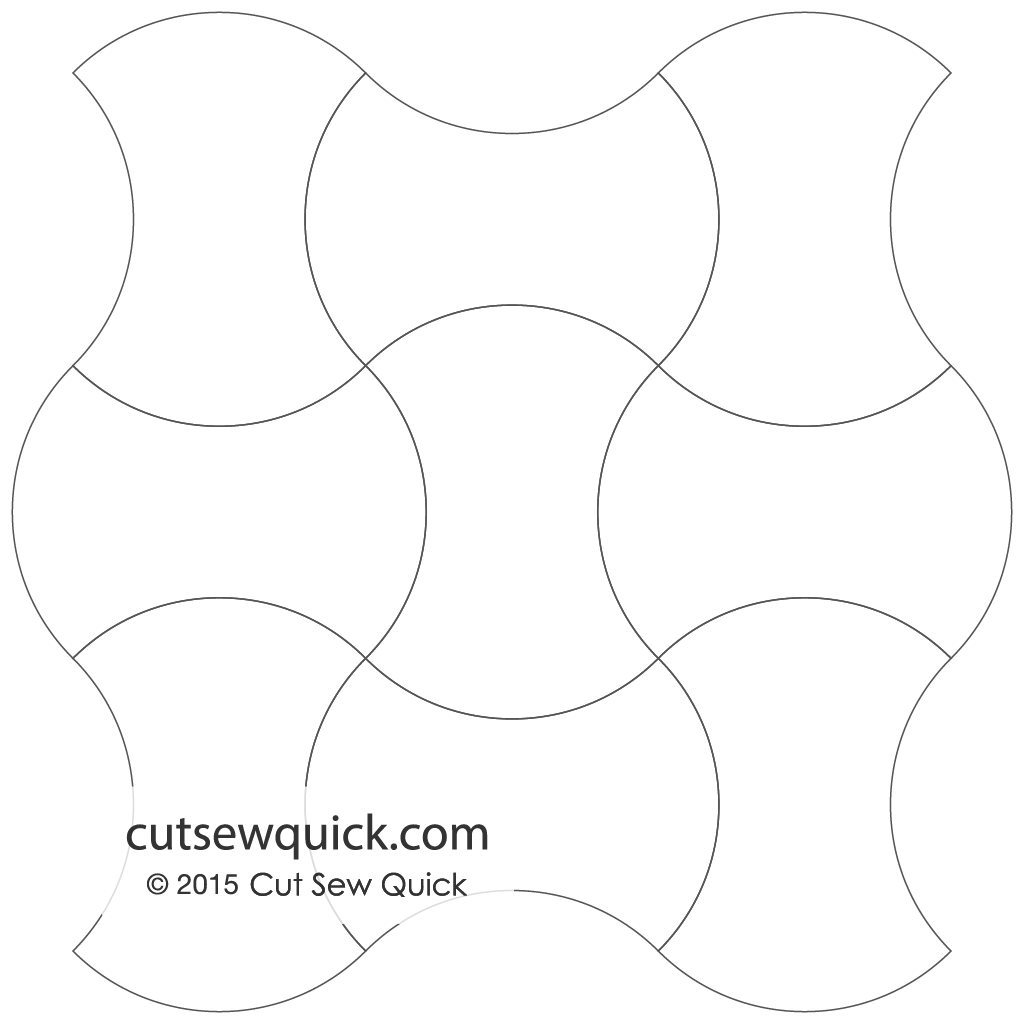
 Example: Apple Core Layout
 -

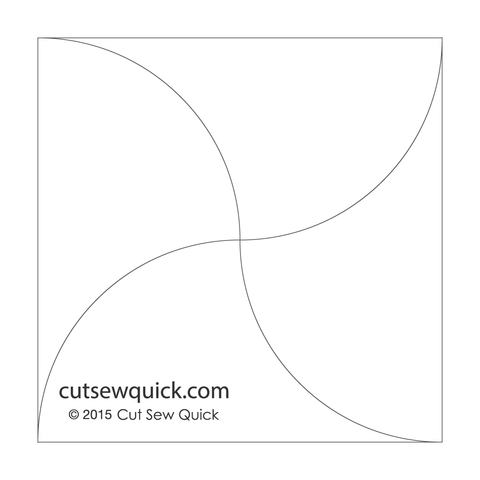
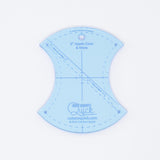
 Example: Diagonal Split Apple Core Layout
 -
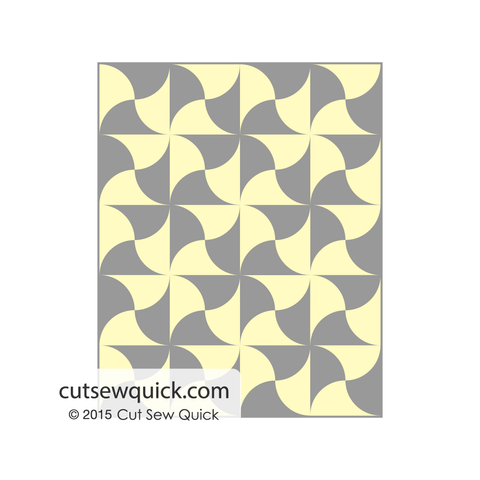
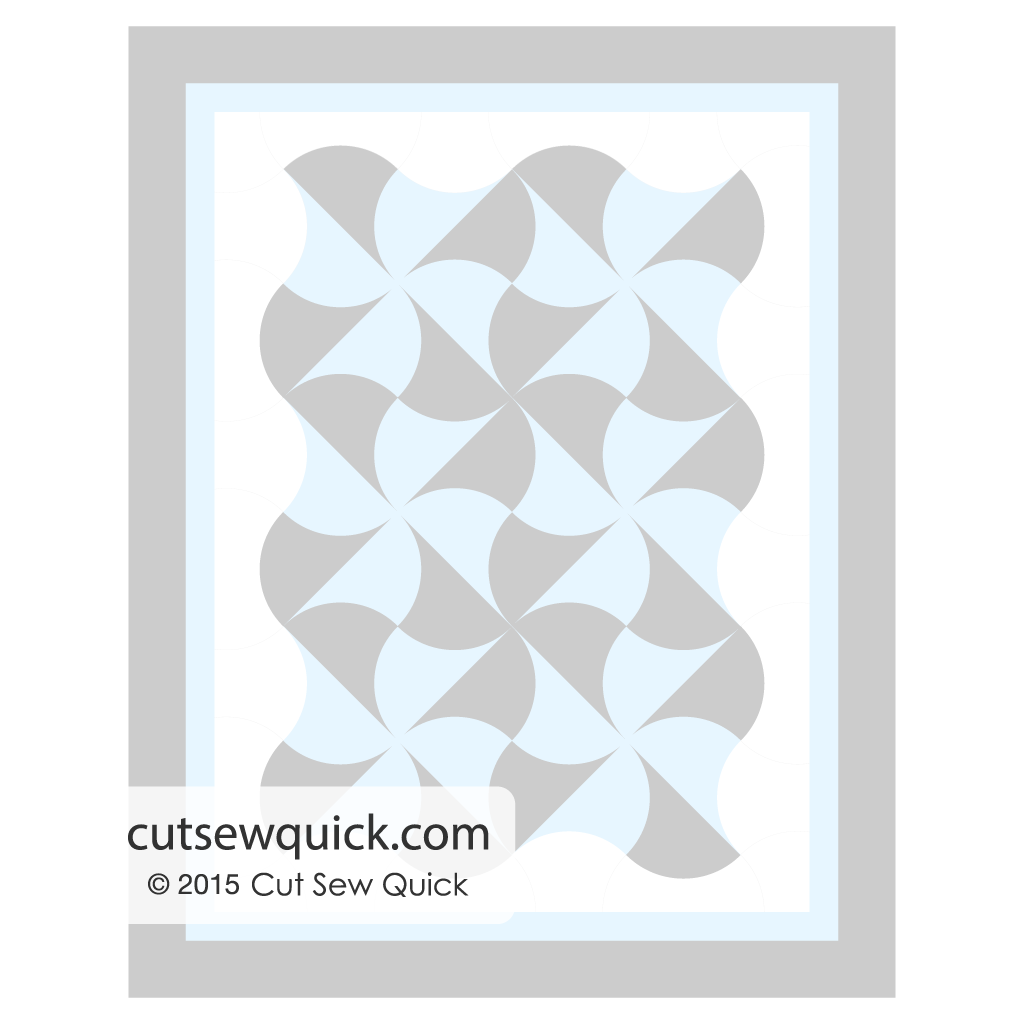
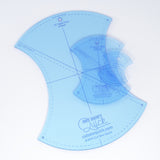
 Example: Quilter's Fan Block created using the diagonal line of the Apple Core shape
 -
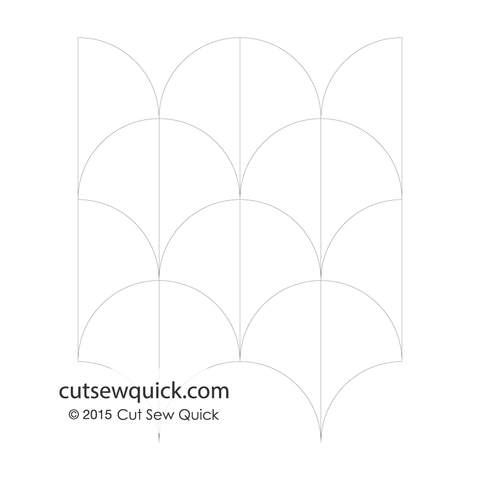
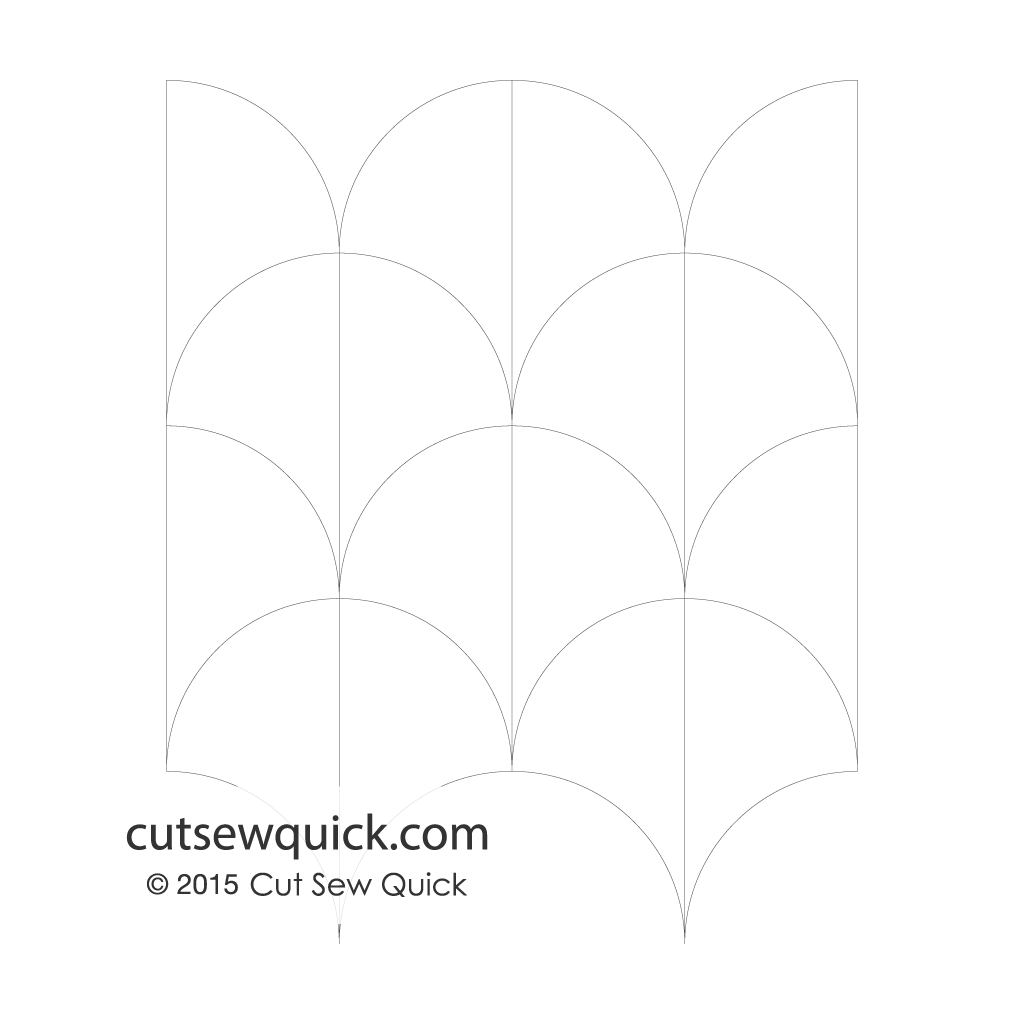
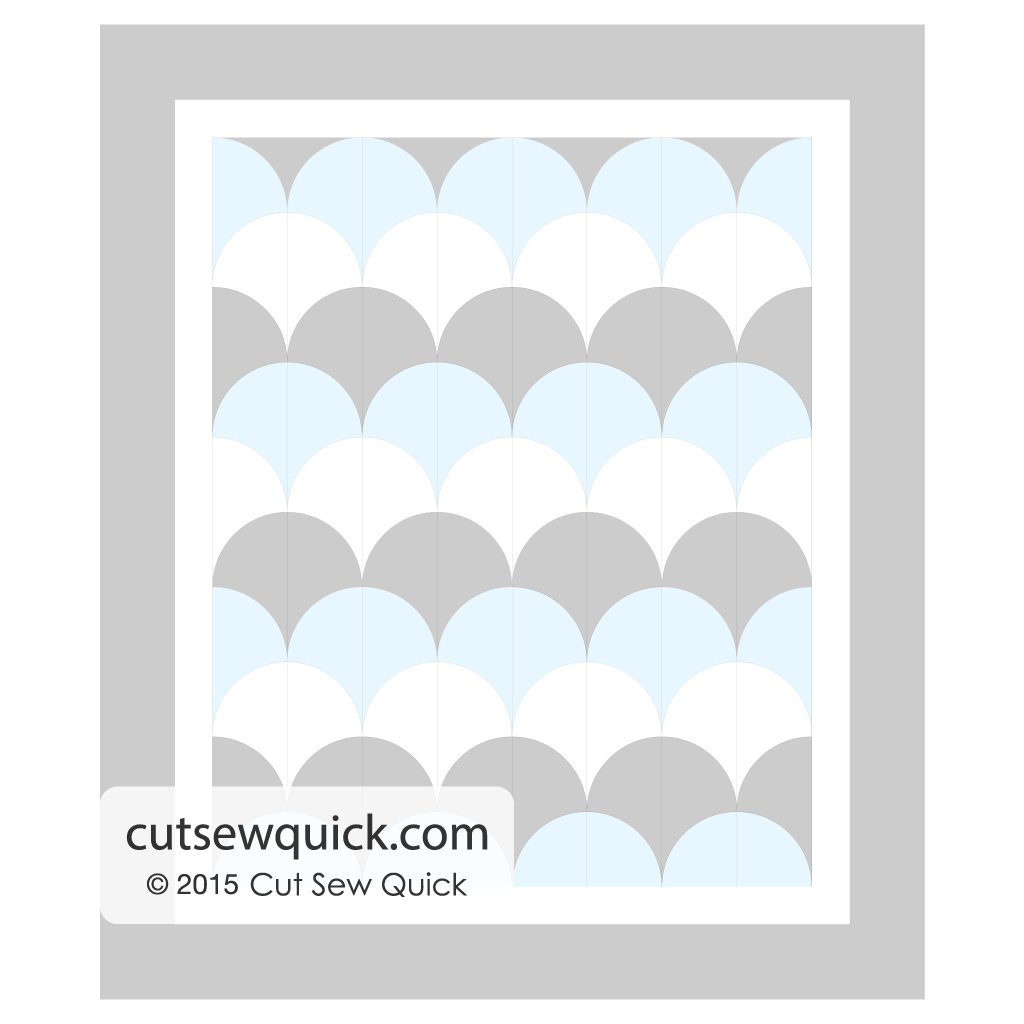
 Example: Half Clamshell Layout
 -
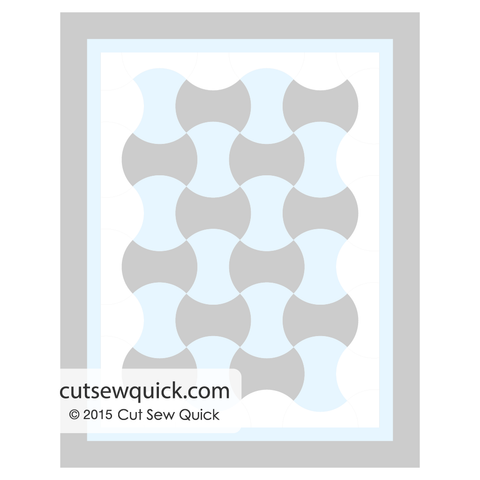
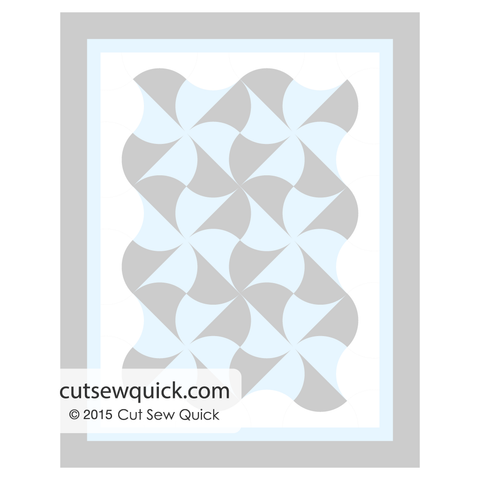
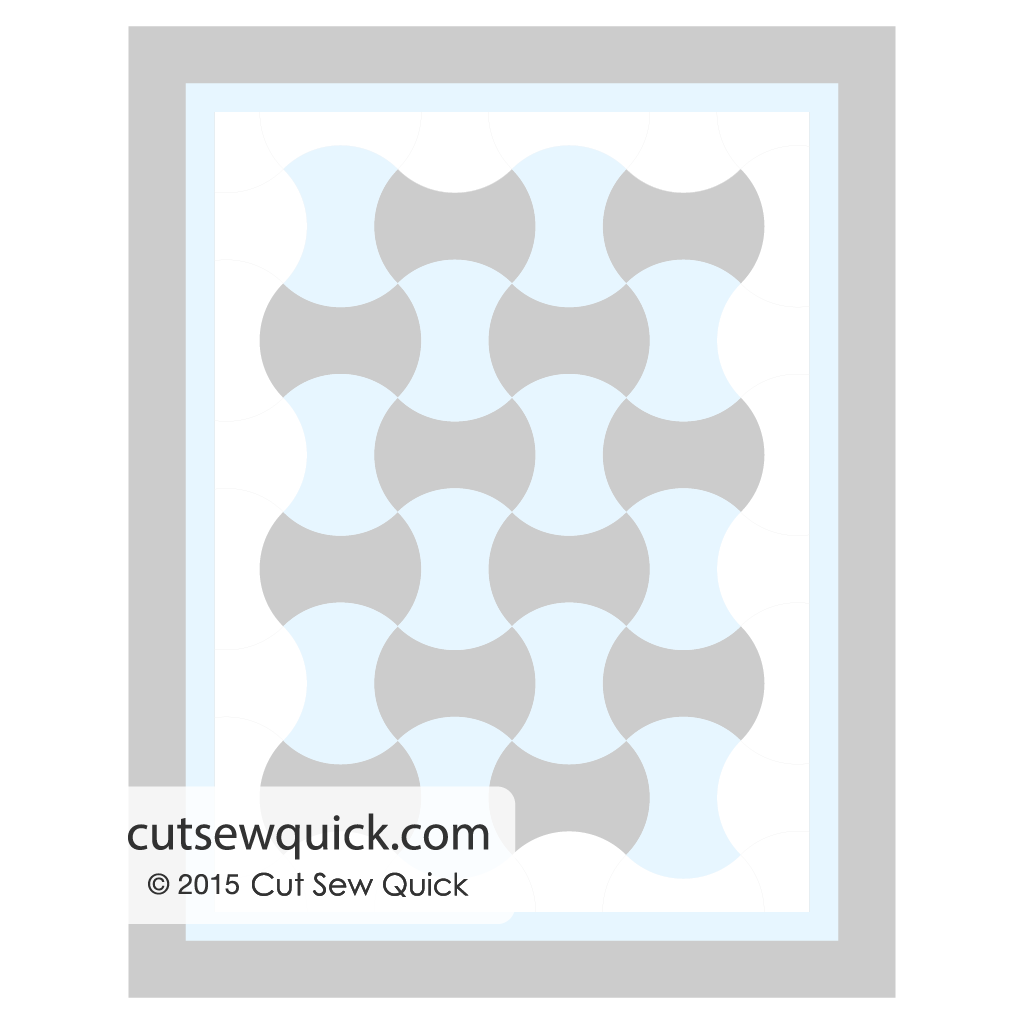
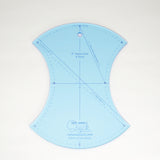
 Example A: Straight Edges Achieved w/ Halved Apple Cores Shown w/ Double Border
 -
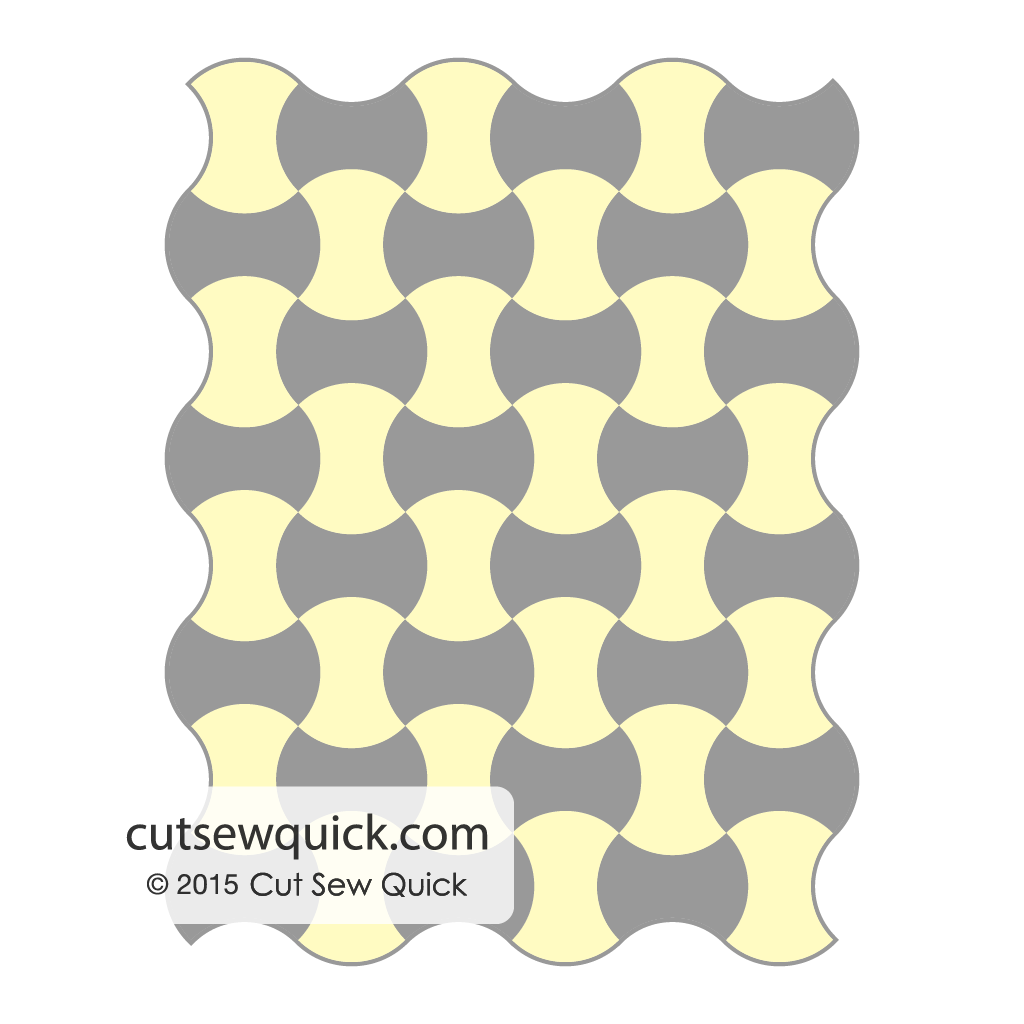
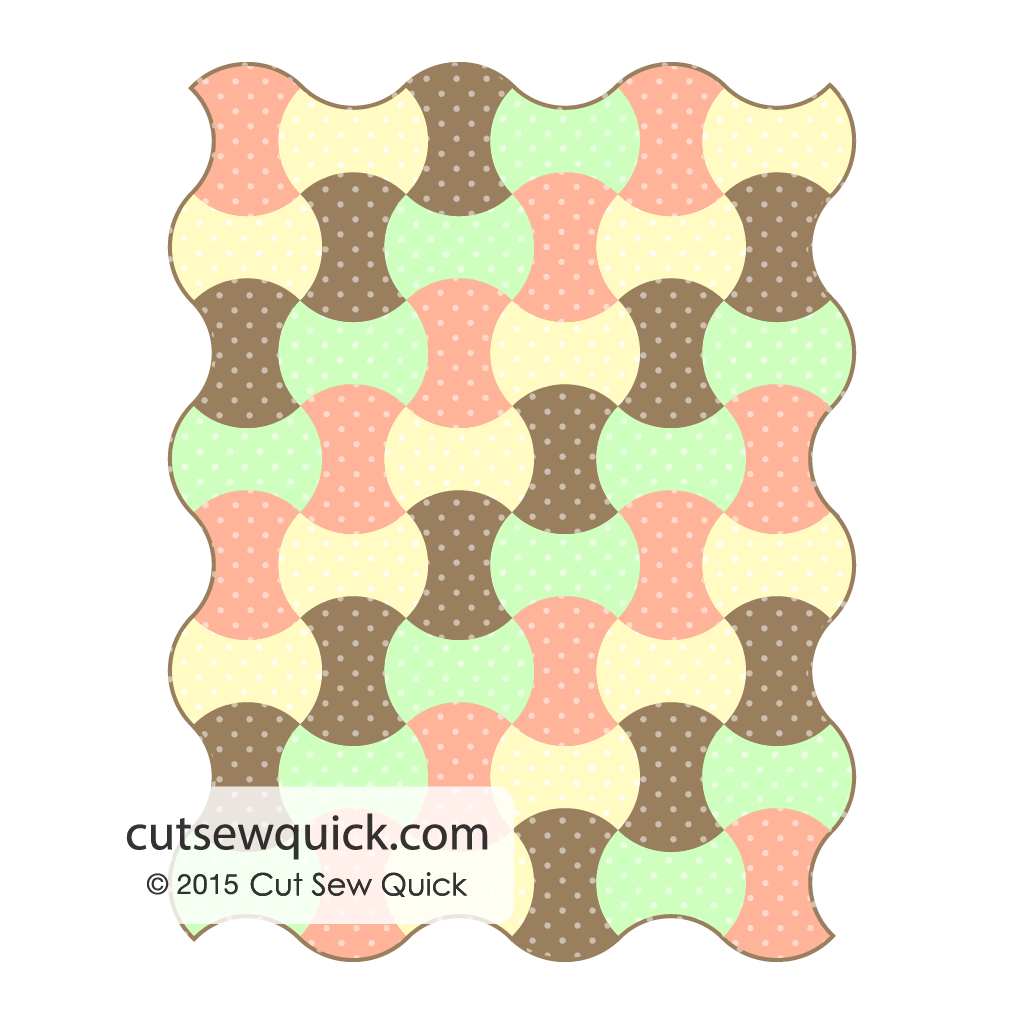
 Example B: Two Color Apple Core Quilt w/ Curved Edges & Bias Binding
 -
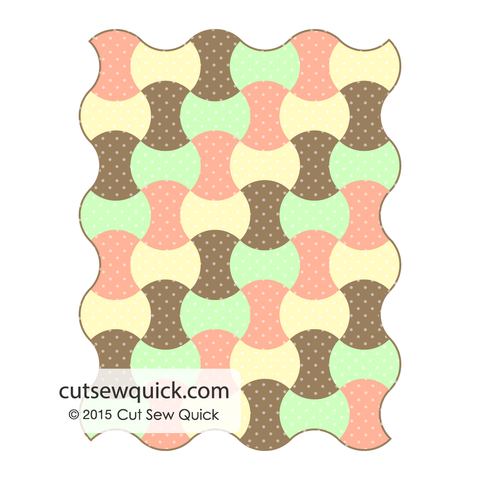
 Example C: Four Color Quilt w/ Curved Edges & Bias Binding
 -
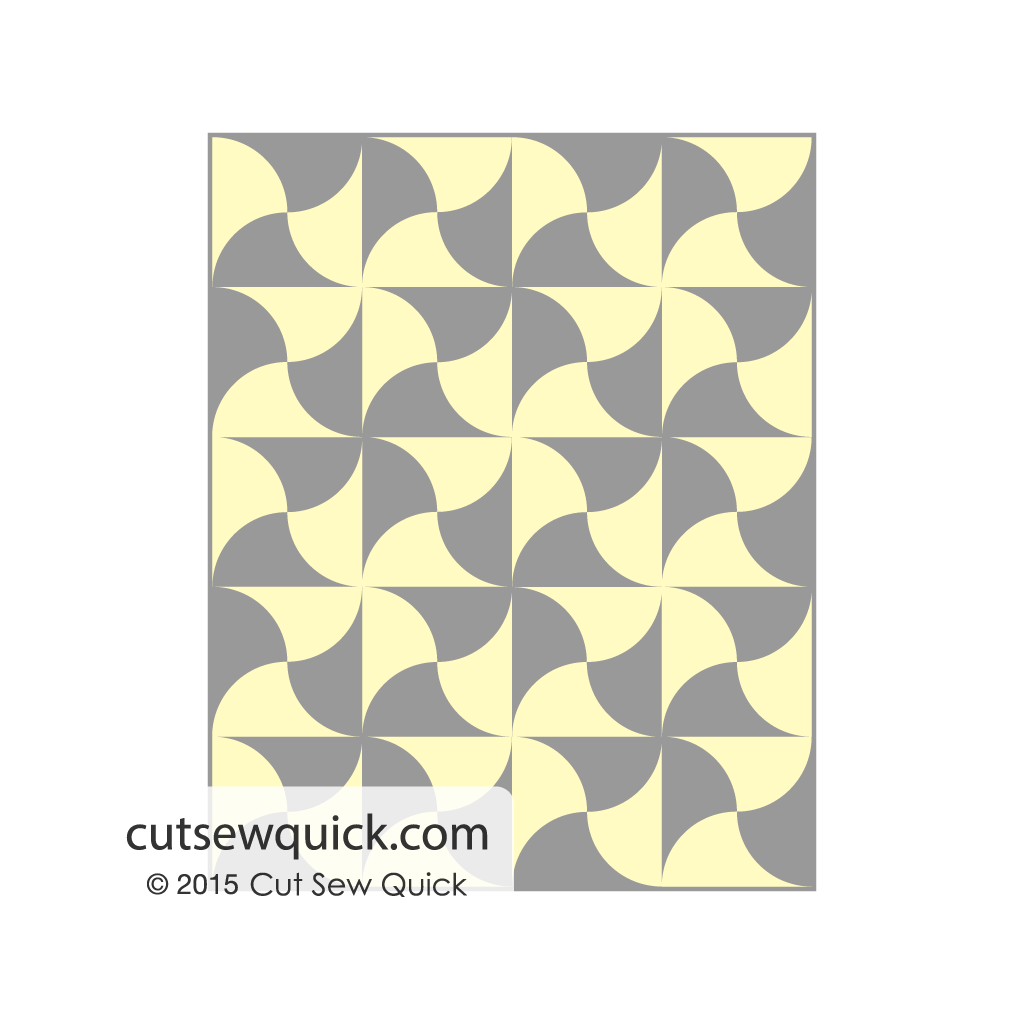
 Example D: Assembled like solid Apple Cores, using Diagonal Split Apple Cores gives an illusion of the Quilter's Fan
 -
 Example E: Quilter's Fan w/ 2 colors
 -
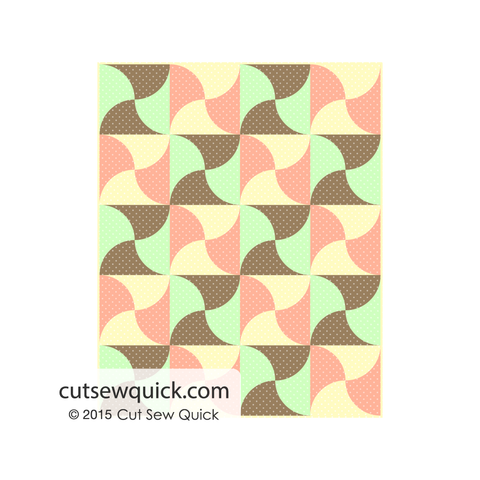
 Example F: Quilter's Fan in 4 colors, 2 alternating blocks
 -
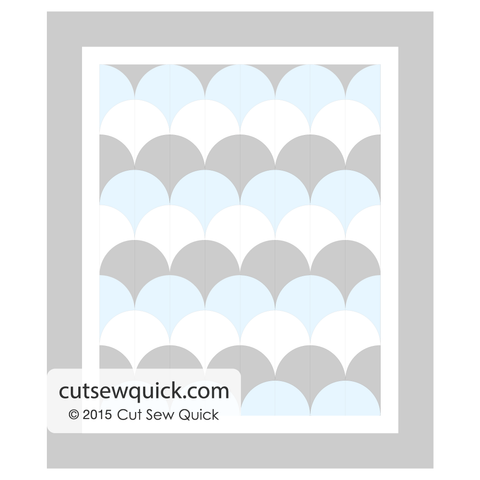
 Example G: Half Clamshells arranged to look like a clamshell can make piecing a little easier


Other Sizes Available
-
2½” Apple Core & More Template
$ 4.99 -
5” Apple Core & More Template
$ 6.99 -
Apple Core & More Template Set
$ 25.99 -
8” Apple Core & More
$ 12.99


Related Blog Articles
10” Apple Core & More
$ 16.99
| Product | Template Size | Fits on Precut |
|---|---|---|
| 10” Apple Core & More | 10” by 7½” | Layer Cake |
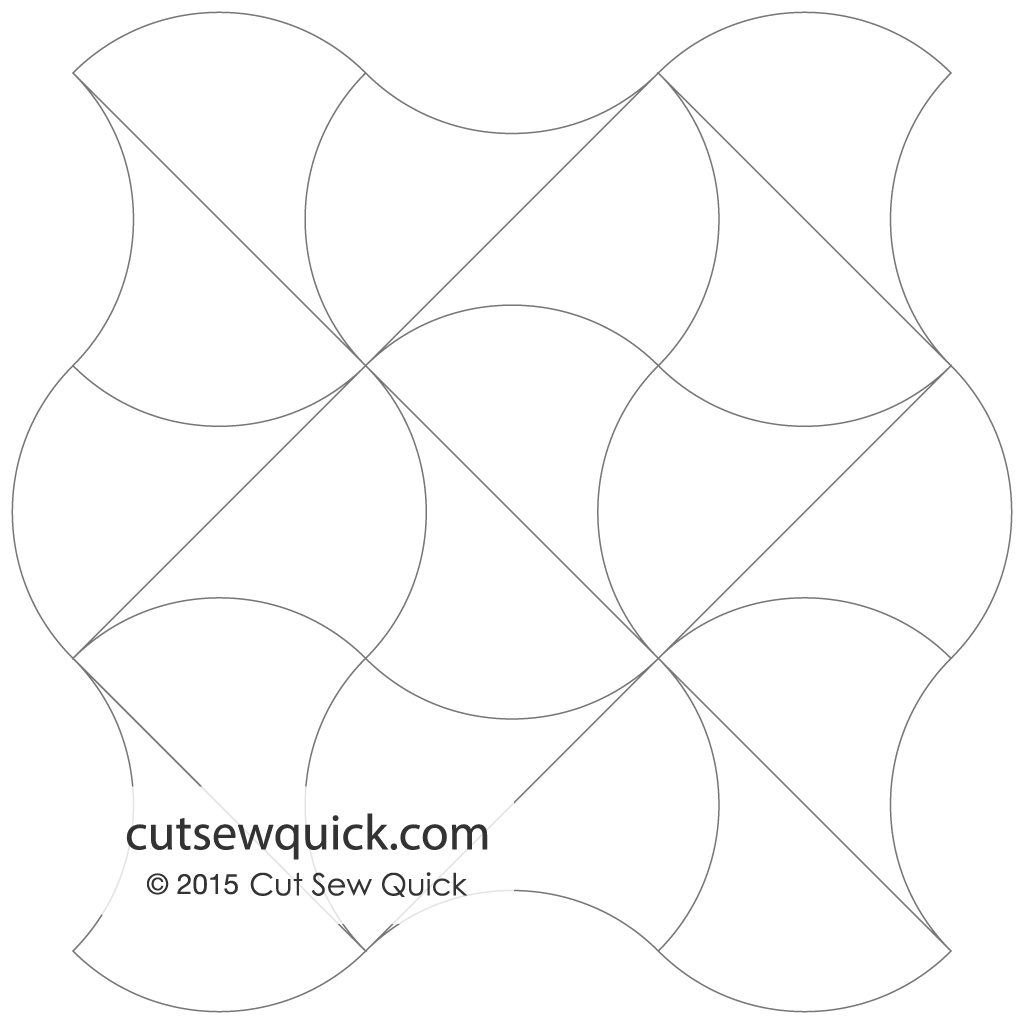
Reminiscent of the shape of an apple when it's been eaten, the Apple Core is a popular curvy one-patch shape. Take a closer look at our template and you'll see that it is different than the ordinary Apple Core templates you've seen before. We've made ours special by providing you with markings which allows you to split the Apple Core on the diagonal, as well as vertically and horizontally. That's why we call this the Apple Core & More!
Be sure to read up on how to use this template. It can be tricky at first, but once you understand how to use the markings, it becomes much easier.
How to Use It
Apple Core: Place the template on your fabric and either trace it with your favorite marking tool then cut it with scissors. Use the long horizontal and vertical lines to help you center, align prints, stripes, or "fussy cut". Tick marks are engraved on the ruler near the edge on both sides of of the long lines. These tick marks are placed a quarter inch away so you can either line up to the long line or tick marks, depending on whether or not you need the seam allowance in the cut shape.
Diagonal Split Apple Core: Depending on whether or not you're joining two fabrics or using two pieces of fabric which have already been joined, determines where you will place the template.
- If you'll be joining two pieces together to form an Apple Core, use the long solid line labeled Cut Edge (which runs from the top left to the bottom right of the template) to align the cut edge of your fabric.
- If you're using two already joined pieces, place the template so that the dashed line (which runs from the top left marking hole to the bottom right marking hole of the template) will lay right on top of the seam.
Quilter's Fan or Half Clamshell: Place the template on the cut edge of your fabric along the long solid diagonal line labeled for Cut Edge (which runs from the top left to the bottom right of the template) to align the cut edge of your fabric. You will need 4 pieces in order to form a single Quilter's Fan block.
(Whole) Clamshell: To make a whole clamshell you'll simply cut a folded piece of fabric. Instead of placing the template so that the diagonal line is aligned to a cut edge, you'll use a folded piece of fabric. When you open up the piece, you'll have a clamshell patch.
Halved Apple Cores: Cutting the Apple Core in half allows you to straighten up the sides of your quilt. The long horizontal and vertical lines seem to be the obvious spot to line up to. However, if you do it that way, you'll be cutting away seam allowance. If that's not what you want, then use the tick marks that are a quarter inch away to include the seam allowance.